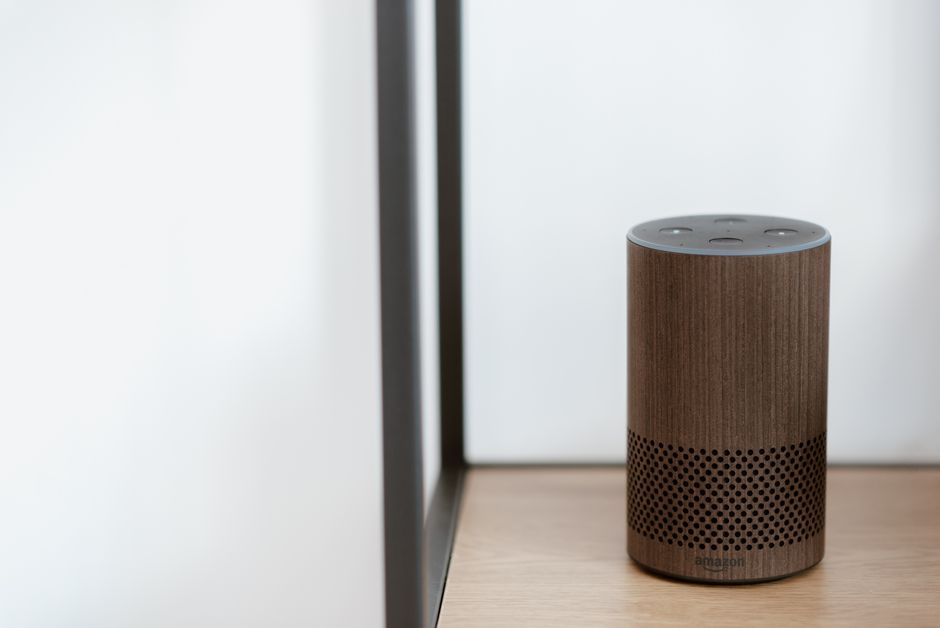

Step 1: Unbox, Plug In, and Power Up Correctly
Begin by physically unpacking your Amazon Echo device. The exact model (Echo Dot, Echo Show, Echo Studio) will dictate the power adapter, but all require a direct connection to a wall outlet. Do not plug the device into a computer USB port or power strip with surge suppression, as this can cause erratic behavior or failure to boot. Locate a central location in your main living area—ideally at ear level on a table or countertop, away from walls, windows, and metal objects. This placement optimizes far-field voice recognition.
Insert the power adapter firmly into the device’s base and the wall outlet. You will see a spinning blue light ring (or, on an Echo Show, the Amazon logo). Wait for the light to turn solid orange. This orange ring indicates the device has powered on successfully and is now in “setup mode,” broadcasting its own temporary Wi-Fi network. Do not skip the 15-second wait. If the light turns red immediately, you may have a faulty power source or an overheating issue; unplug, wait 30 seconds, and try a different outlet.
Step 2: Download the Alexa App and Sign In
The Alexa ecosystem is managed entirely through the Amazon Alexa app (iOS or Android). Download this specific app—not the Amazon Shopping app, the Prime Video app, or “Amazon Alexa Companion.” Search for “Amazon Alexa” by Amazon Mobile LLC. Once installed, open the app and sign in using your primary Amazon account credentials (the one tied to your Prime subscription, if relevant). Using a secondary account will block access to Prime Music, Whole Foods ordering, and household device sharing.
After signing in, the app will immediately prompt you to “Set up a new device.” If this does not appear automatically, tap the Devices icon (the house) at the bottom right, then the “+” icon in the top-right corner, and select “Add Device.” From the list, choose “Amazon Echo” and then your specific model (e.g., “Echo Dot 5th Gen”). The app will request permission to access your phone’s location (critical for weather, traffic, and time zone accuracy) and Bluetooth (for the initial handshake). Grant all permissions.
Step 3: Connect to Your Wi-Fi Network (The Critical Step)
The app will now ask you to confirm the orange ring is visible on your Echo. Tap “Yes.” The app will search for nearby Echo devices. If it fails to find one, ensure your phone’s Bluetooth is on and that you are within 10 feet of the device. Once discovered, you will see a list of available Wi-Fi networks. Select your 2.4 GHz network (most Alexa devices are dual-band, but 2.4 GHz offers longer range and better penetration through walls for the initial connection). If your network requires a password, enter it now.
Crucial optimization: Open your router’s settings (typically via 192.168.1.1) and ensure your router uses WPA2 or WPA3 encryption. WEP encryption is not supported. Also, disable “AP Isolation” or “Client Isolation” on your router—this feature prevents devices on the same network from communicating, which will instantly brick Alexa’s multi-room audio and smart home controls. Once connected, the Echo’s light ring will turn blue and then briefly cyan, followed by Alexa’s voice: “Hello, your device is now ready.” Wait for the light ring to turn off completely.
Step 4: Configure Vital Settings (Privacy, Location, and Language)
The app will now lead you through five critical configuration screens. Do not rush these. First, set your language and time zone. Alexa supports multiple dialects (U.S. English, UK English, Australian English, etc.). Choosing the wrong dialect will cause misinterpretation of commands like “Alexa, what’s the weather?” (e.g., “16 degrees” means Fahrenheit in the U.S. but Celsius in the UK).
Second, adjust privacy controls. Tap “View Alexa Privacy Settings.” Disable “Use of Voice Recordings for Development” if you do not want your clips stored for indefinite periods. Enable “Delete Voice Recordings Automatically” and set it to “3 months” or “Don’t save.” This does not break functionality. Next, configure “Alexa Voice Purchasing” —set a four-digit PIN and enable “Require Confirmation Code for All Purchases.” This prevents accidental orders of Amazon products, gifts, or digital subscriptions if a child, guest, or a misunderstood TV commercial triggers a purchase.
Finally, enter your home address. This is mandatory for location-based skills (delivery notifications, traffic, local business search) and for weather forecasts. Use the exact street address (including apartment number) to ensure “Alexa, order paper towels” routes to the correct Amazon Fresh location.
Step 5: Run the Sound Check and Finalize Smart Home Tethering
Alexa will now offer to teach you basic commands. Skip this tutorial and proceed to the “Echo & Alexa” tab in the app’s settings. Tap your device name. Here, you will fine-tune audio performance.
Tap “Sounds” and adjust the “Wake Word” (choose from Alexa, Amazon, Echo, Computer, or Ziggy). If you live in a noisy environment or have another device named “Alexa,” switching to “Echo” reduces false triggers. Immediately below, run the “Sound Check” —the device will play a tone and the app will measure ambient noise. This calibrates the microphones for beamforming.
Next, enable “Adaptive Volume.” This feature automatically raises the volume when the room is loud and lowers it during quiet moments. Do not skip this; it dramatically improves usability in open-plan homes.
Final action: Tether your smart home hub. If you own Philips Hue, Lutron Caséta, or a Ring security system, tap “Smart Home” in the app. Select “Devices” then “Discover Devices.” Alexa will scan the network for any smart home bridges or bulbs. Wait 60 seconds. All discovered devices will appear under “Scenes” and “Groups.” Immediately organize them into a Room (e.g., “Living Room Lights”)—this allows you to say “Alexa, turn off the living room” instead of turning off each bulb individually. For Zigbee-based devices (like certain Sengled bulbs or Amazon Smart Plugs), no hub is required; the Echo itself acts as the controller. Test this by saying “Alexa, turn on [device name].”
Technical Verification to Ensure Full Functionality
After the five steps, verify three critical performance metrics. First, latency: say “Alexa, stop.” The response should be under one second. If it lags, your Wi-Fi signal strength is low. Use the Alexa app’s “Device Status” screen—if signal strength shows “Very Good” or lower, move the Echo or install a mesh Wi-Fi extender. Second, microphone array health: say “Alexa, what is the weather?” then lower your voice to a whisper seven feet away. The device should still hear you. If not, reset the microphone array by unplugging the device for 10 seconds. Third, multi-room audio: simultaneously play music on two Echo devices by saying “Alexa, play everywhere.” If one device is silent, check that both are on the same Amazon account and connected to the same 2.4 GHz SSID.
Security Best Practice: Immediately after setup, open the Alexa app, go to Settings > Account Settings > Voice Purchasing, and disable “Purchase Music and Books by Voice.” This prevents unauthorized purchase of premium content. Also, navigate to Settings > Alexa Privacy > Review Voice History and delete any captures made during setup—these are never needed for functionality.
Troubleshooting the Orange Ring Loop
If your Echo remains stuck on orange after Step 3, the Wi-Fi password was mistyped or the network is incompatible. Press and hold the Action button (the small circle on top of the device) for 5 seconds to put it back into setup mode. Delete the device from the Alexa app via Devices > Echo & Alexa > [Your Device] > Delete. Repeat steps 1–4. If the issue persists, your router may be broadcasting on DFS channels (common in 5 GHz). Access your router settings and set the 2.4 GHz channel to a static channel like 1, 6, or 11.